Reso / support / active whenever they are available (energy permitting) & CA spam while waiting for skills OR Hunter Claymore rotation
Companion skills
Column_kit
Skills
Note
Eclipse Rend
Support skill (14s CD)
Rafayel attacks the enemy multiple times, then drops a Fishtail Beacon that can be picked up for 2 stacks of Potential. Empowered Support skill: Deals additional damage on top of normal support skill damage and applies burn to the enemies, which deals DoT for 5s.
Column_kit
Skills
Note
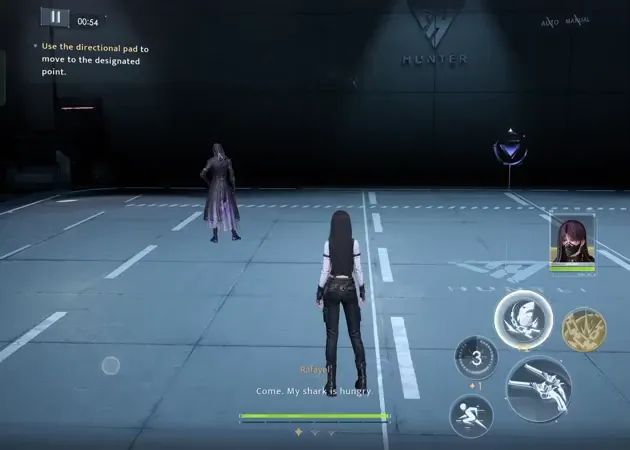
Fantasia Shark
Resonance skill (15s CD) (2 energy cost)
You and Rafayel use chains to pull enemies into a group in front of you, and then Rafayel summons a shark to bite all enemies in range and break protoshields.
Column_kit
Skills
Marked enemy with passive
Searing Slash
Skills
Abyssal Beacon
Passive skill
A fishtail icon will randomly appear above an enemy. When a charged attack is used on this marked enemy, the icon is consumed as a stack of Potential, represented by the yellow bars below your HP bar. After gaining 6 stacks of Potential (from either this Passive or Rafayel’s support), Rafayel will unleash Searing Slash to deal damage on an enemy. Searing slash can interrupt most enemies’ attacks.
Signature Weapon: Phantasma Sands
Column_kit
Skills
Basic attacks combo
Charged attack
Skills
Abyssal Rapid Fire
Basic attack / Charged attack
Up to 5 single target attacks in a full combo string. Charged attacks deal damage in an AoE.
Column_kit
Skills
Note
Oceanic Traversal
Active Skill (8s CD) (1 energy cost)
Does damage in a straight line, similar to the hunter gun active skill.
Note
Abyssal Shadow
Passive skill
Using basic attacks increases attack speed and crit rate. Active skill inflicts burn (DoT) on enemies.
Active Pair Bonuses
R0 - Increases crit damage when Potential stacks are full
R1 - Enemies that are inflicted with burn will take more damage
R2 - Energy charge speed increases by 50% for 4s after gaining a stack of POTENTIAL
R3 - Searing Slash does more damage, and using a charged attack on enemies marked with the fishtail icon gains 2 stacks of Potential instead of just 1.
Once your AB team achieves 10,000 ATK, it is recommended to start building for D2W/Crit instead of ATK.
Recommended Rotations
Abysswalker gameplay is very straightforward, with no strict rotation. Use AB’s resonance skill to group enemies. Identify which enemy is marked with the fishtail icon and use a charged attack on it to gain stacks of Potential. Use support skills to get stacks as well.
Perfect dodge advice
Depending on the level, it can be useful to constantly trigger perfect dodges to reset the CD, but never use the empowered support - if you wait until the empowered flashing ends to use the support, you can continue to trigger them using perfect dodges without a cooldown. This means that you do not have to wait the full 14s (support skill CD) to gain two stacks of potential and you can trigger searing slash faster. Ideally, you want to trigger Searing Slash in weakness, but triggering it as many times as possible is also useful.
R0 & R-1
When using R0 in stable and directional orbits, you will usually need to equip and ORB, meaning that you will not have enough EEB to constantly use both the active and resonance skills as they come off cooldown. Prioritize using the resonance skill because it can put enemies into weakness and has great grouping. This usually means using the active skill only once (or never, depending on the EEB you have) for every two resonances.
When using R-1 AB on a 4*, the above still applies, but if using AB on an R1+ 5* pair, you can equip two EEB regardless of SHC or orbits.
R1+
AB’s ranks do not fundamentally change his gameplay, aside from having more energy to use his active skill.
Hunter Claymore Rotations - ideal for Bosses
Hunter claymore works very well with Abysswalker because its charged attacks have the same effect as the signature weapon, meaning you can still activate Rafayel’s searing slash quite easily. All of the notes for his gameplay with the signature weapon apply, but hunter claymore tends to do more raw damage.
For all ranks, Abysswalker’s resonance puts you back quite a distance from the enemy. This means that your claymore rotation becomes tighter on timing when trying to do two Frangere Slashes in a single weakness state. You will have to dash ONCE towards the enemy before pressing the active button. Practice the Claymore rotations with AB to get the timing down.
As usual, Hunter Claymore gameplay requires lots of EEB to consistently use the active skill. If you are using R0 AB in orbits, you can consider still using 2 EEB instead of 1 EEB and 1 ORB because the overall damage from additional Frangere Slashes may outweigh the damage an Oath will do, depending on your stats. You can experiment between the two if you are trying to min-stat clear a stage.